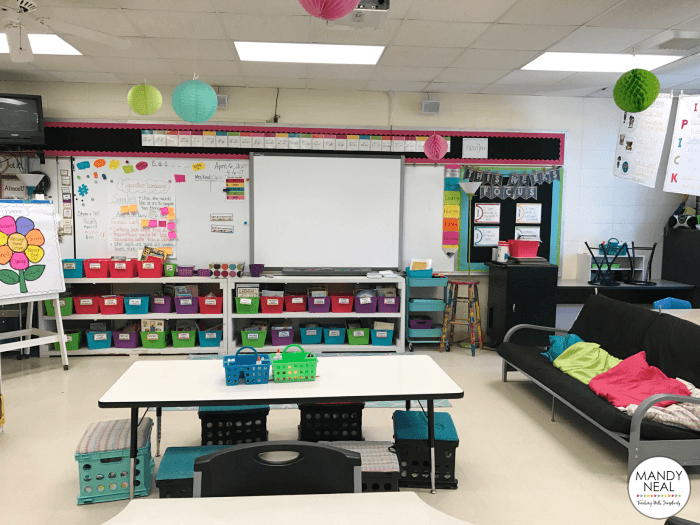
Classroom, Flexible Seating, Multifunctional, Organizing
Flexible Seating ~ A How-To-Guide
This brilliant blog post from Mandy, the blogger behind Teaching with Simplicity is just what is says in the opener, a real “How-To-Guide” to flexible seating. She detailed all the steps to transition from regular to flexible seating and has helpful advise and recommendations for each of them.
She and her teaching partner Annie are in this together and they both talk about their experience with flexible seating and what they do if things don’t work out as planned. We particularly like Annie’s summary:
- Even into the fourth quarter you have to remind them about procedures and routines. The kids get way more comfortable in a flexible seating room. That is good but can be quite annoying.
- Be prepared for things to get broken and dirty. It’s kind of hard. You start out the year with this beautiful classroom. Into the fourth quarter, things don’t look as pretty. Look for functional furniture, middle of the road prices, and look for used stuff and sales. Cheap furniture, turns out to be cheap and broken quickly. But like me, I had stuff given to me that wasn’t cheap, just used. It’s held up pretty well. You need to start preparing early. Always be on the lookout for something that will fit in your room.
- Find a partner or team to do it with you. I can’t imagine doing it on my own. There have been several times when I went to Mandy’s (my teacher partner) room and said “what have you done when a kid does this?” Or “OMG, do your kids do this?” Or even just, “Ah, I think I’m gonna give up flex seating.” Lol. It’s a lot easier when someone is doing it with you.
- Don’t be afraid to change it, if it’s not working. Flex seating is a fairly new trend. There is not a right or wrong way to do it. It’s ok if you take it slow or jump right in.
Mandy even put together a free Flexible Seating Guide which is available here: Free Flexible Seating Guide
To read to full blog post, please follow this link: Flexible Seating ~ A How-To-Guide
